

When the wrath of Mother Nature strikes, causing damage to your home’s roof, a quick and effective solution is crucial. Knowing how to tarp a roof is important – it allows you to minimize further weather-related ruin while awaiting professional repairs.
This process involves key stages: assessing the severity of harm, documenting for insurance coverage, the precise measurement for your roof tarp purchase, executing debris clearance, and securing the tarp accurately on your damaged haven.
It might sound challenging, but don’t fret! This blog post will guide you through each step in detail – making even this seemingly daunting task manageable. Contact professional roofers for repairs after the storm blows away.
Step-by-Step Guide: How to Tarp a Roof
Assess the damage to your roof, document it, measure the area, cover it, and purchase a tarp that is appropriate in size.
Assess the Damage
Suffering roof damage can be a homeowner’s worst nightmare, but it’s the first crucial step in initiating an effective repair process.
Start with a thorough visual examination from ground level and climb onto the roof only when safe. It’s also important at this stage to protect yourself using the proper safety equipment, including gloves, non-slip shoes, and a hard hat if available.
Document the Damage
Documenting the damage is a crucial first step in tarping your roof. It’s about understanding the scale of repairs and keeping a record for insurance.
Start by thoroughly inspecting each roof section and note any leaks or missing shingles. Then, use a high-resolution camera to capture clear images of all damaged areas.
For example, loose shingles caused by severe weather or storm damage should be visible in your photos. Similarly, any water damage inside your home’s interior due to roof leaks should also be documented.
Measure the Area and Buy a Tarp
Determining the size of the area that requires tarping is crucial before rushing off to your local hardware store for purchase. Begin using a tape measure to ascertain the dimensions of your damaged roof accurately.
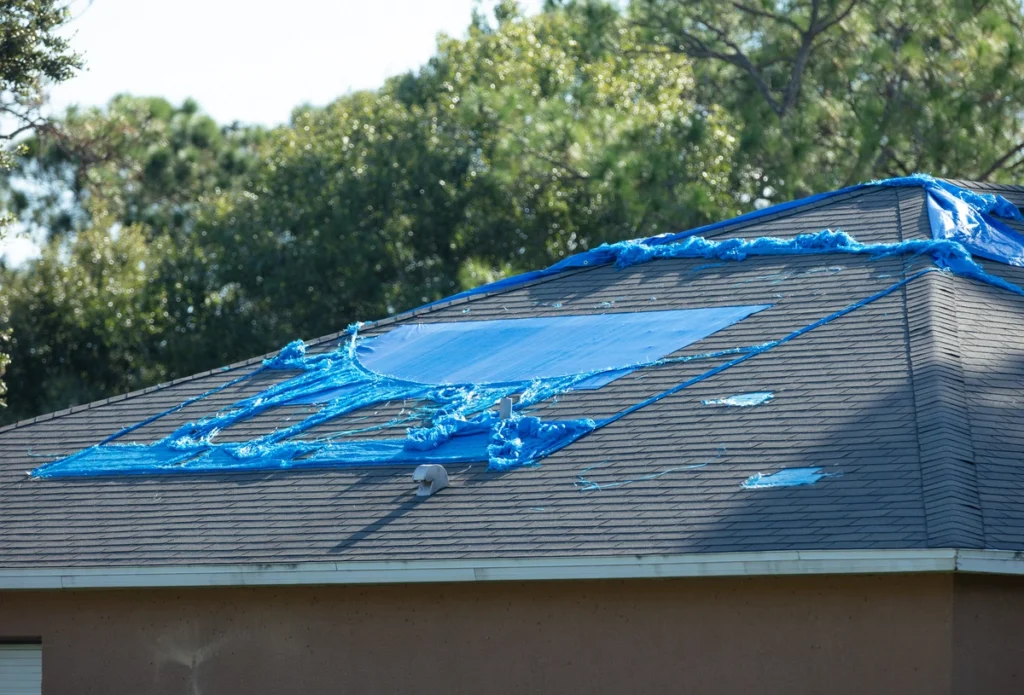
Proceed to secure a high-quality tarp from your local hardware store or online. The type of tarp you need primarily depends on how severe the leaky roof or damage is. For minor leaks, an ordinary blue polyethylene tarp – often seen in backyard settings – may suffice.
However, for more extensive damage due to loose shingles or inclement weather conditions, consider investing in heavier-duty tarps that can withstand wind and prevent water penetration long enough until roofing professionals can execute full repairs.
Thus, remember this simple guiding principle when buying a tarp for your emergency repairs or roof repairs: ‘Bigger and tougher will never make one suffer!’
Clear Any Debris
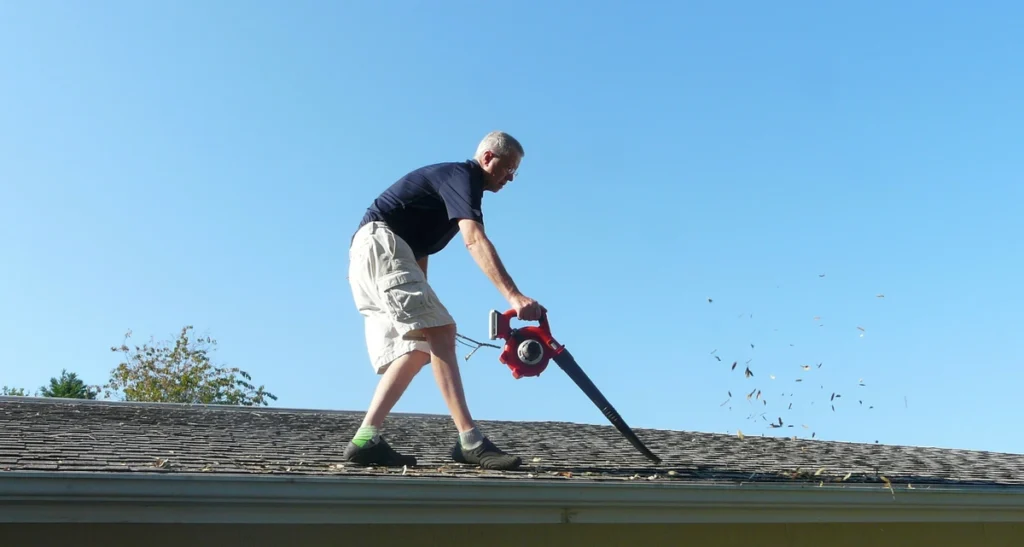
Clearing away any debris that may have accumulated is crucial. Debris, such as leaves, twigs, and branches, can obstruct the proper placement and securing of the tarp.
Loose materials on the roof can become projectiles during high winds or storms, causing additional damage to your property or posing safety risks to those nearby. Remember to exercise caution while clearing debris from your roof.
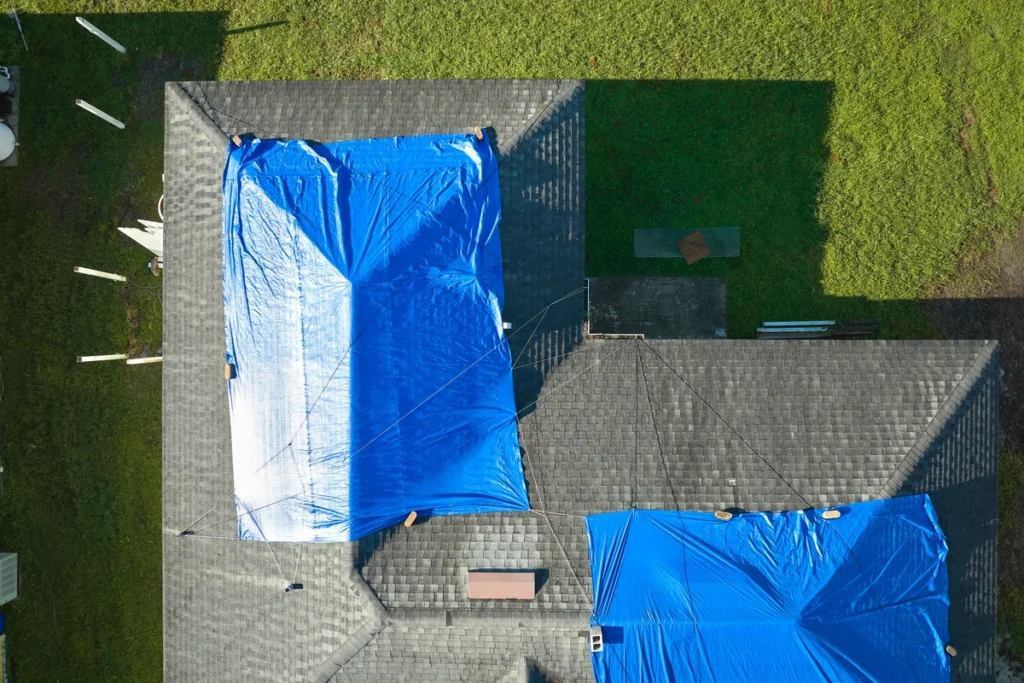
Position the Tarp
To position the tarp on your damaged roof, start by ensuring that any debris, nails, or loose shingles have been cleared. This will create a smooth surface for the tarp to rest on and prevent further damage.
Hang One End of the Tarp Over the Ridge
To properly tarp a roof, it’s crucial to hang one end of the tarp over the ridge. This allows for adequate coverage and protection against water damage.
Imagine a heavy storm rolling in with strong winds and torrential downpours. Without securely hanging one end of the tarp over the ridge, you risk exposing vulnerable spots on your roof to potential water damage.
Whether you’re dealing with missing shingles, loose tiles, or cracks in your roof, hanging one end of the tarp over the ridge is an extra layer of protection until proper repairs can be made.
Screw the Anchor Board Into the Roof
To secure the tarp on your roof, you’ll need to screw or nail an anchor board into the damaged area. This step is crucial in creating a strong and stable foundation for the tarp.
Position and lay the anchor board horizontally across the damaged part of your roof, ensuring it extends beyond both sides of the affected area.
By screwing in the screws on this anchor board, you create a solid base that prevents wind from catching underneath or lifting off your tarp during inclement weather.
Roll Up Any Excess Tarp Hanging Over the Eaves
Rolling up any excess tarp hanging over the eaves is crucial in properly tarping a roof. This ensures that the roof tarping itself is securely fastened and prevents it from getting damaged or causing any hazards.
Having at least 4 feet of overhang from the roof’s peak provides sufficient coverage and protection against water damage.
Remember, when securing your tarps after measuring and positioning them correctly, keep an eye on those edges!
So don’t neglect this important step – roll up that excess tarp hanging over the eaves for a secure temporary fix while waiting for professional repairs or insurance claims to be settled.
Affix with 2x4s or Sandbags
To ensure the tarp stays securely in place and protects your roof, you can affix it with 2x4s, plywood, or sandbags. One option is to hang one end of the tarp at least four feet over the ridge and then secure it with 2x4s or sandbags.
This helps to anchor the tarp tightly against the roof, preventing any wind from getting underneath and causing damage.
It’s important to note that while these methods are temporary fixes, they provide immediate protection for your damaged roof until proper repairs or replacements can be made by a qualified roofing contractor.
Conclusion
Tarping a roof is crucial in protecting your home from further damage during inclement weather.
Remember to assess the damage, document it for insurance purposes, measure the area accurately, clear any debris hindering the tarp’s placement, and securely position the tarp.
Whether you or homeowners are dealing with loose shingles or missing tiles on various roofs, including mobile homes or tile roofs specifically – there are specific instructions for effective tarp installation depending on each type.
Refrain from letting bad weather turn into more extensive repair jobs; take immediate action by properly covering your damaged roof with tarps. Contact a reputable roof contractor for further professional help!